How to Create A Guest Wi-Fi Network?

On the off chance that you are having visitors over at your place frequently, at that point it gets difficult for you to give them access to the internet. You need to give them access to the internet and yet, you likewise don’t have any desire to share your safe, private, home network with any other individual. There are really two different ways by which you can give your visitors access to your Internet network. Either share the subtleties of private, home Wi-Fi network which you utilize or make a Guest Wi-Fi Network for visitors.

How to Create A Guest Wi-Fi Network?

What the vast majority would prefer not to do is share their private, home Wi-Fi network with visitors in light of the fact that not exclusively is there an opportunity for the data to be taken yet there is additionally the chance of malware unknowingly spread from the visitors’ gadgets.

Thus, for that reason there is the requirement for a different, surmise Wi-Fi network which can furnish the visitors with internet connectivity and furthermore keep your home network protected and secure. Fortunately, for all the Xfinity clients, there is a component called Xfinity WiFi Home Hotspot through which you give internet access to your visitors without any obstruction with the principle network.

This element, Xfinity WiFi Home Hotspot is accessible without any extra on the off chance that you are a current Xfinity Gateway client. With this component enableed, your Xfinity Wireless Gateway broadcast an extra SSID or WiFi Network, “xfinitywifi”. This is done independently from the principle network, without any obstruction with the primary WiFi network.

Through this network, you can permit your visitors to utilize the internet without you sharing your network password or the fundamental network with them. It is incorporated with the administration without any extra expense and you can enable or disable it whenever you need to.

How to enable the Xfinity WiFi Home Hotspot Feature?

On the off chance that you are a current Xfinity Gateway client and utilizing Xfinity administrations, at that point this component will be accessible without any additional charge. It is a valuable component through which visitors can appreciate the internet without you sharing your principle, secure network with them.

In the event that you have visitors coming at your place frequently, at that point you should keep this element enableed as it comes helpful and permits individuals to appreciate the benefits of Xfinity WiFi.

Here is the manner by which you can enable the Xfinity WiFi Home Hotspot include:

  1. Connect to the Xfinity Gateway Network from your PC or Mobile.
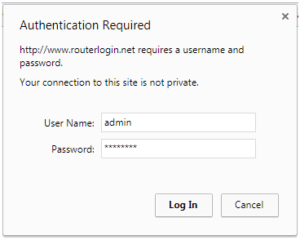
  2. Open an internet browser and head over to customer.xfinity.com/#/settings/security/hotspot.
  3. Sign in to your Xfinity account utilizing the Xfinity ID and login password.
  4. Click on the Turn On catch to enable the Xfinity WiFi Home Hotspot include.
  5. A confirmation brief will show up, confirm your choice.
  6. You will currently get a confirmation message that Your hotspot has been enableed.

In the event that you actually wish to kill this element, at that point essentially click on the Turn Off fasten and confirm your determination.

Remember that your gadget probably won’t be qualified for this element and won’t broadcast any hotspot signal. In the event that you visit the Hotspot page and see the data about Xfinity WiFi yet don’t perceive any alternative to Turn On or Turn Off this element then it implies that your gadget isn’t qualified for this component.

How To Change WiFi Password?

If you want to change the default router WiFi password then follow this step-by-step guide.

How To Change WiFi Password?

NETGEAR:

  1. Open your router setup page using its default IP address – 192.168.1.1 / 192.168.0.1 / http://routerlogin.com/.
  2. For authentication enter default username and password.
  3. Go to Wireless > Security Options > Select WPA2-PSK [AES] > Now enter your preferred password in Passphrase.
  4. Apply chances and reboot your WiFi for changes to effect.

D-Link:

  1. Login to your router settings page via its default IP Address – 192.168.1.1 / 192.168.0.1.
  2. Input your username and password (or here’s list of default username and password).
  3. Go to Wireless > Wireless Security > Security Mode set to WPA2 only > Pre-Shared Key: enter your preferred password.
  4. Apply the change > restart your WiFi and the new password will be applied.

TP-Link:

  1. Login to Router admin panel using its default IP Address – 192.168.0.1 / 192.168.1.1.
  2. Enter the default username and password (admin/admin in most cases).
  3. Navigate to Wireless > Wireless Security > WPA/WPA2 – Personal (Recommended) > Password.
  4. Enter your preferred password and Save the change.

What Is the Service Set Identifier (SSID)?

SSID or Service Set Identifier in networking is the advanced presence mark for networks that are editable and are built by basic dialects and characters. A more simplified clarification is SSID are the names that are obvious as accessible networks on a gadget, for example, a PC or a cell phone. The basic case of SSID that can be seen each day is accessible WiFi or the hotspot name that is set physically or of course. Each network has a SSID and for items, the SSID as a matter of course is typically their image name or the model name as in routers or modems.

What Is the Service Set Identifier (SSID)?

Default SSIDs of any gadget is the one that is on it working without getting set physically. It’s simply the name of hotspot or WiFi that you tap on for getting connected to that network once in a while with a password or even without that. Manual SSIDs are proposed for keeping the network secure instead of the default SSIDs that are more powerless against programmers. A network can likewise have more than one SSID and the SSID can be changed for any wireless network by the host.

Static / Dynamic IP

An IP address represents Internet Protocol and now there are these two sorts of IP addresses that can be effortlessly separated. There is Static IP which as it sounds is un-editable and more coordinated towards its lasting presence. Then again, Dynamic IP is dynamic as it very well may be changed and is editable to a superior degree. There are some straightforward the contrasts between both the IP and one is the way it is given. A static IP address is given to the PC by ISP though the dynamic IP address is generally given by DHCP. Static IP continues as before once it is alloted to a PC of the gadget though Dynamic IP can be changed whenever.

Static / Dynamic IP

Static and Dynamic IP is diverse for security reasons also because of the less security on Static IP though Dynamic IP is safer and contains less danger. The static IP address permits a gadget to be detectable then again Dynamic IP address makes the gadget unmanageable. Soundness additionally has any kind of effect in both the IPs as the Static IP address is steady when contrasted with Dynamic IP address.

What Is an IP Address?

IP Address represents Internet Protocol Address and is a mathematical name that every one of the gadgets chipping away at the internet is appointed. For various PCs and gadgets conveying on the internet, there is a similar number of IP addresses. This IP address is comprised of numbers that can be perused by clients typically as a basic language. It serves a significant part in PC networking and has two capacities in networking. The two elements of the IP Addresses are interface identification and area addressing as it is answerable for the identification of gadgets or PCs.

What Is an IP Address?

The two Internet conventions that are very notable are Internet Protocol variant 4 (IPv4) and Internet Protocol form 6 (IPv6). IPv4 is a more seasoned or obsolete variant as it peruses IP addresses as a 32-cycle number. IPv6 was close to IPv4 as the clients over the internet expanded and IPv4 finished with the absence of IPv4 addresses. IPv6 ended up better because of the 128-digit number in IP addresses that began in the year 1998. IP addresses are straightforward numbers thus they are coherent without need of any product as it’s simply a basic mathematical organization.

NETGEAR Router Setup

Setting up a NETGEAR Router is very easy and once you have got the router and are connected to it, configuring the router is just a few minutes away. You can follow this quick guide to easily set up your NETGEAR Router.

  1. Plugin the ethernet cable at back of your NETGEAR router and power it on.
  2. Now connect to internet over WiFi and open your web browser and head over to http://www.routerlogin.com or http://www.routerlogin.net.
    NETGEAR Router Setup
  3. A login page will appear. Enter the default username and password. The default username is admin and the default password is password.
    NETGEAR Router Setup
  4. Once you log in, go to Internet from menu > Setup Wizard > New Connection and follow the NETGEAR Genie to configure your router.
  5. If “PPPoE DSL Internet Connection Detected” then ask your ISP for the Username and Password.
    NETGEAR Router Setup
  6. Once your router is configured then internet connection status will turn GOOD.
  7. Now visit the Wireless section to configure your Wi-Fi Network.
  8. Select an SSID (name) for your Wi-Fi Network and select a suitable password under Security Options (WPA2-PSK) Passphrase.
  9. Apply the changes and you’re now all done setting up your NETGEAR Router.

D-Link Router Setup

D-Link Router can be configured in just a few minutes and once you have configured the router and set it up, your Wi-Fi connection will set up and you will be able to connect to the internet through your D-Link Router.

Before proceeding, make sure the ethernet cable is attached to modem or an active data jack to the ethernet port in back of your router.

Follow these steps to set up your D-Link Router –

  1. Power on your D-Link Router.
  2. Connect your PC to the router using an Ethernet Cable or WiFi.
  3. Once your PC is connected, open a web browser and go to http://192.168.0.1 or http://192.168.1.1 (The default gateway address may vary from model to model).
    D-Link Router Setup
  4. A login page will appear. The default username is admin and the password field is to be left blank. Click on Log In.
  5. Now, you can configure and set up your router using the Internet Connection Setup Wizard.
  6. Under Wireless Setup enter SSID (WiFi Name) and Key (Password).
    D-Link Router Setup
  7. Under WAN Setup choose Connect type: DHCP/PPPoE/Static (You can ask your ISP about your internet connection and the required details).
  8. After you have configured your internet connection, you can then click on Save and Connect and the router will now connect to the Internet.
  9. You can then visit the Wireless Settings and set up your Wi-Fi Network including its SSID and password.

TP-Link Router Setup

If you have bought a new TP-Link Router, then configuring the router and setting it up is really easy. You can easily set up your new WP-Link Wi-Fi router and will be able to use it.

Note: To connect to the internet, the router must be connected to an active modem or data jack

Follow this guide to set up your new TP-Link Router:

  1. Power on the router and connect your PC to the router using an Ethernet cable.
  2. Once connected, open a web browser and head over to 192.168.0.1 or www.tplinkwifi.net.
    TP-Link Router Setup
  3. Set your router login password by entering it twice. It is preferred to keep it simply, “admin”.
  4. Click on Let’s Get Started/Login.
    TP-Link Router Setup
  5. Now, follow the on-screen instructions and configure your Internet and Wireless Network using the Quick Setup option.
    TP-Link Router Setup
  6. Enter the name (SSID) for your Wireless Network in the given field and also, set a password to secure your Wi-Fi network.
  7. Now, you can finish the process, after which you will be able to join the Wireless Connection with the SSID using your password.

Find Router IP Address

192.168.1.254 and 192.168.0.1 are set as the default IP address on most routers and modems. However, if you cannot connect to your device using this IP address, your device may have been assigned a different IP address. In this case, you need to use a different method to find your device’s IP address. This method differs according to the trading system you use. You can easily find the default IP address of your router by selecting the one that matches your operating system from the list below and following the steps.

Windows

If you are a Windows user, the things you need to do are very few and easy. You can find your router IP address in Windows by following the steps below:

  1. Click on Windows Start Menu.
  2. In the search box, type Command Prompt or cmd.
  3. In the Command Prompt application, type ipconfig in the box and press Enter.
  4. The Default Gateway section represents the default IP address of your device.

macOS

If you are a macOS user, the actions you need to do are similar to Windows. You can find your router IP address in macOS by following the steps below:

  1. Follow Apple Menu > System Preferences > Network.
  2. Find your current internet connection.
  3. Click on the Advanced button.
  4. You can see your device’s default IP address in the TCP/IP tab.

Android

If you are an Android user, there are several methods you can apply.

  1. Open the Wi-Fi section in the Settings menu.
  2. Click Manage Network Settings.
  3. Click Show Advanced Options.
  4. Select Static from the IP Settings list.
  5. In the Gateway section, you can see the default IP address of your router.

You can also easily find your device’s default gateway using third party apps. In this regard, you can use applications such as Wi-Fi Analyzer.

iOS

If you are an iOS device user, you can follow the steps below:

  1. Click Wi-Fi from the Settings menu.
  2. Find your current internet connection.
  3. Click the Static tab.
  4. In this tab you can see the IP address of your router.

Linux

If you are a Linux user, you can follow the steps below:

  1. Follow Applications > System Tool > Terminal.
  2. Run “ip r | grep default” or “route -n” in the terminal application.
  3. The Gateway section represents your default router IP address.